Wednesday, September 28, 2011

Re-Vamp!

I have fallen off of the wagon lately with my blog :(    So many things have been going on in life that it seems finding the time to share a few lines has fallen between the cracks.  Not to mention that I was a little disappointed in the abilities to customize my blog.  I took it upon myself to see what could be done and VOILA I have brushed up on some coding and created lots of new elements :)     

To get myself back on track I spruced things up a bit and made things a bit more cheery! Y'all let me know what you think!  Feel free to comment!

With holiday season upon us I am hoping to do lots of seasonal projects and hopefully some personalized projects for friend and family! (hint, hint...)  With so many ideas swirling around my head it is hard to keep track of things sometimes... definitely makes it hard to choose which ones I want to do around MY house as well!  Between making treats and decorations for Halloween (which is always close in the running for my favorite holiday) my house will probably be a sea of orange and black mixed with flour and sugar within the next couple of weeks! 

I do have lots of catching up to do so be prepared for blogging overload for a few days!  Hope you all enjoy it as much as I do!

Tuesday, August 30, 2011

Breaded Chicken with Basil Cream Sauce


This dish proved more difficult than I had hoped on a Monday night.  However, it did turn out pretty tasty :)


You need:


4 chicken breasts (I used 3)
1/2 cup flour
2 eggs, beaten
3/4 cup Italian bread crumbs
3/4 cup panko bread crumbs
salt
pepper
3 tbsp butter


for the sauce:
1/2 cup chicken broth
1 cup heavy whipping cream
4 oz sliced pimentos, drained ( I did NOT use)
1/2 cup shredded Parmesan cheese
1/4 cup chopped fresh basil ( I used 1 tbsp dried) 
pepper


1.  Place your eggs, flour, and breadcrumbs into separate shallow bowls.  Combine the salt and pepper with the breadcrumbs to taste
2. Coat the chicken with flour, then egg, then breadcrumb mixture
3.  Over medium heat, fry the chicken in the butter.  Fry on both sides until juices run clear (about 15 minutes) Remove chicken from skillet when cooked through
4. Add the chicken broth to the skillet.  Bring to a boil and stir to scrape browned bits from pan.
5. Stir in the cream and pimentos, (if using dried basil add it now) boil and stir for one minute. Reduce the heat, add the Parmesan cheese, fresh basil, and pepper.  Simmer until heated through.  pour the sauce over your chicken and serve!


You might try to cook the chicken just under medium heat because mine turned out a bit darker than I would have liked.  It was still pretty delicious!!


Happy Eating :)

Friday, August 26, 2011

DIY Family wall decor

I have been realizing just how boring the walls are at my house lately.  Last night I decided to take a trip to Hobby Lobby! (Always a good/bad idea)  I found a few things that inspired me to get crafty, so here we go!

I made a hanging wall decoration with the word FAMILY.  You can buy something like this at the store for significantly more than it cost me to make it!  Everything is always 50% off at HL!


I will walk you through it step by step.  They are pretty simple, but you need patience!  

Step 1.  

You will need to purchase the wood pieces ($.99) for your words, or you can make your own  Obviously, I purchased 6.They are pretty simple, look like this:

Step 2:

I painted the edges of my blocks with a dark brown acrylic paint.  I am in the process of changing my colors to brown and light blue.  Choose any color you want!  I used two coats, letting the first one dry completely before I applied the second. *I painted a little onto the face of the block because I plan on sanding down the edges for a rustic feel*


Step 3: 

Measure and cut out the scrap book paper for your backgrounds ($.59, and 50% off at HL).  Be creative!  I used 6 different pieces!  You then place a thin layer of modge podge (homemade for me... 1/2 Elmer's glue and 1/2 water) onto your block.  Let it dry for a few seconds then center your cut paper into the face.  (I used my Kroger card to smooth out the bubbles)

Step 4:

Here is where the patience comes in... If you have a cricut or something like it you may want to use it now.  I however, do not (yet)!  I downloaded an outline font on the computer and printed out the letters.  Don't be afraid to alter your font... I changed the "F" up a little because I thought part of it was too skinny.  You're being creative, don't forget!  I had to sit and carefully cut out all of my letters, but I think they turned out well! ('Tis a little blurry)

Step 5: 

Now, as I said before I wanted to sand down the edges for a more "rustic" feel.  I started with a 600 grit sand paper, which really did nothing to the edges so I switched to a 150 grit.  Try it out and decide which one is best for your taste.  Remember, the lower the number the rougher the sand paper.  Once you sand the edges, paint a layer of modge podge over the entire face of the block.  Let dry and continue.  Here is a before & after:


Step 6:

Now, use ribbon (50% off rolls of ribbon at HL) to create a loop for hanging.  I hot glued mine to the back, but I am sure a staple gun would work just as well.  Make sure they are centered and all are the same length.  I used to different lengths, but make sure the one that need to match do, other wise, your finished product will look crooked.  Once your ribbon has dried completely you are ready to string them onto your rod.  I used an extra curtain rod we had at home, but use whatever you want... I am thinking of using a branch next time!


Step 7:

Once my letters were strung, we placed the end back on the rod and hung it on the wall.  We used two nails and a level (trust me you need one).   We took a step back and this is what we saw.  


The first time I did the ribbons I did long, short, long, short, etc... When we hung it and looked at it, it looked crooked because the F was long and the Y was short.  I made a few adjustments and voila!  I think the entire project cost me about $9.00.  Granted, if you don't have some of the stuff it may be a little more, but...  I have seen stuff like this selling for $20-$30 in the store!!  

Happy crafting :)


Wednesday, August 24, 2011

Laundry detergent!!

I don't know about you guys, but I am ALWAYS washing clothes!  It is a never ending battle :(  When I have to buy laundry soap I always get discouraged by how expensive it is!!  I think I may have found the solution!! Granted, I have not tried this yet, but I am hopeful!

You will need:

1 bar of soap (any kind)*
1 cup of borax (found in the laundry aisle)
1 cup of washing soda (NOT BAKING SODA; also found in the laundry aisle)
A large pot that holds more than 2 gallons
A grater
A funnel (optional, but handy)
A spoon long enough to stir entire pot
2 empty 1gl containers


1. Grate your bar of soap and place in the pot
2. Pour 1gl of water in your pot.  Cook until grated soap dissolves.
3. Add the borax and washing soda
4. Bring contents to a boil.  It will coagulate
5. Turn off hear and add 1gl cold water. Stir well!

Pour your detergent into your containers and voila!

I plan on trying this tonight when I get home so I will let you know how it turns out tomorrow!  Also, sorry for the lack in posts recently, but I have been busy being excited!  We are going to have a new addition to the family sometime next April-ish!  I hope everyone is having as wonderful a week as I am!

Happy Washing!!


*I have done some research and for those of you with he washers, it is recommended you use fels-naptha soap(also in the laundry aisle) because it does not create suds.


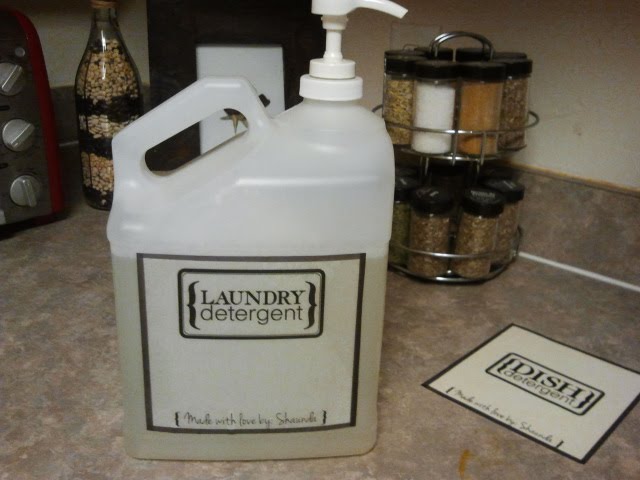
Mine didn't turn out quite as cute... but here ya go :)


Monday, August 22, 2011

Breakfast Delicious-ness


Saturday morning I decided to try the breakfast cups I had my eye on.  They seemed easy enough on paper.  Things were going well until I realized I desperately need to invest in a rolling pin!  Still, everything was pretty simple.  

you need:

6 slices of bread
6 pieces of bacon
6 large eggs
Butter

You want to brown your bacon before you put everything together.  Don't cook it until crisp as it will continue to cook in the oven which needs to be preheated to 375.

1. Butter the muffin tin generously.
2. Roll your pieces of bread flat, then cut them into large circles.  I used a drinking glass.
3. You then want to cut all 6 pieces in half.
4. Place the bread in your muffin pan, overlapping each other
5. Lay your cooked bacon across the bread
6. Crack an egg into each container
7.  Cook for about 20-25 minutes, or until the egg whites are solid.

Make sure you take them out while they are still warm.  Enjoy!

I hope you enjoy your Saturday morning breakfast as much as we did!  Although we had other wonderful to help us!  

Happy Monday all!


Friday, August 19, 2011

Creamy Ranch Chicken

Wednesday night I wasn't feeling well so my potato soup did not get made :(  I will definitely make it next week sometime!  I am making lasagna tonight which shall be a fun family affair!  Now to last night, I made what is called creamy ranch chicken.  It was extremely delicious and the name is a little misleading.  It is not the prettiest dish, but none the less the tastiest of the options thus far.  I didn't get a picture of it because Jarrod came home right about the time it was finished, and I forgot all about taking a picture... sorry!  It is pretty simple so I don't think you need a picture :)


What you need:


6 slices of bacon
4 skinless, boneless chicken breasts
2 tbs flour
2 tbs ranch dry salad dressing mix
1 1/4 cup milk
3 cups of noodles (I used egg noodles again.  I am all about economy sized items)
1 tbs shredded Parmesan cheese


1. Boil the water for your pasta, cook according to package.  In a separate bowl mix together flour and dry ranch mix.
2. Cut bacon into narrow strips, cook over medium heat until crispy, drain all but 2 tbs of the drippings
3. In the same skillet, cook chicken in the remaining bacon grease.  Be sure to turn the chicken so one side is not burnt.
4. Once chicken is cooked thoroughly, add the flour and dry ranch mix to chicken.  Stir well to coat the chicken.  Stir in milk.  
5. Cook and stir until thick and bubbly.  Cook 1 minute more after sauce becomes thick.
6. Stir in bacon.
7. Serve over noodles, add Parmesan cheese and enjoy!


Jarrod said he enjoyed this one the best so far!  It packs a LOT of flavor so be ready.  Be sure to make your bacon crispy (some on mine were a little on the soft side, weird texture in the finished product).   Lasagna tonight, then breakfast cups in the morning with chicken and dumplings for dinner!!  We have a packed weekend so it may be Monday before you hear from me again!! 


Happy Friday all

Wednesday, August 17, 2011

Chicken Cordon Bleu Pasta


So, due to my inability to purchase the correct items at the grocery store, I had a last minute change-up last night!  I give you, Chicken Cordon Bleu Pasta.  It turned out delicious, but I was disappointed when I opened my cabinet to find only one can of cream of chicken :(

2 cups cooked, diced chicken
6 oz deli ham, diced
2 cans cream of chicken soup
8 oz sour cream
2 cups shredded Monterrey Jack cheese
cooked pasta (I used 16 oz box of egg noodles)
milk (I needed to add some to make the sauce the right consistency)

I paired mine with fresh garlic bread, but get creative!

Everything turned out wonderfully for me.  The spouse enjoyed it, I enjoyed it, and we for once did not give any to the dog :)

Happy Humpday everyone!